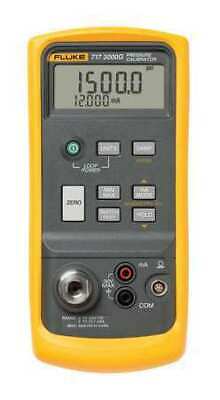
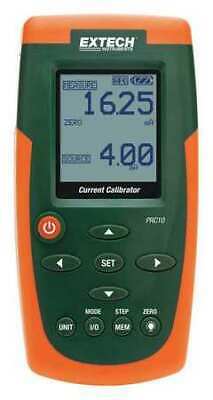
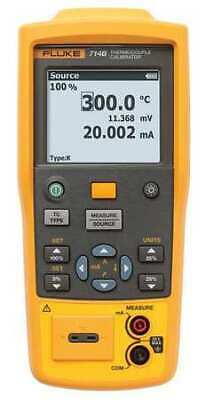
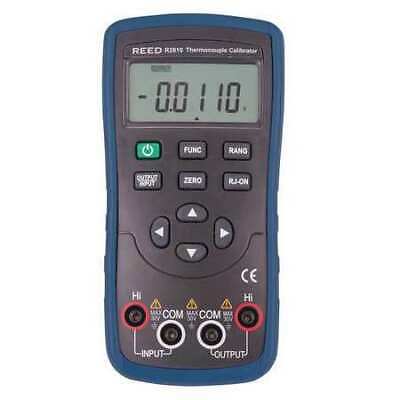
-40%
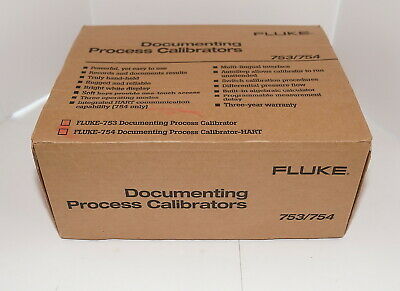
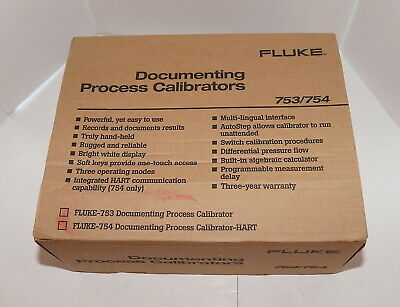
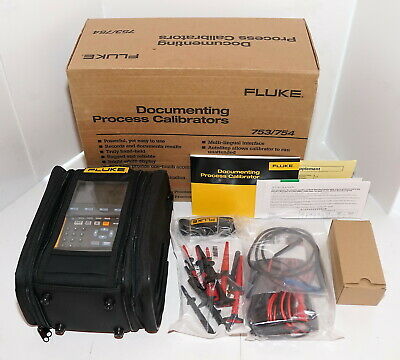
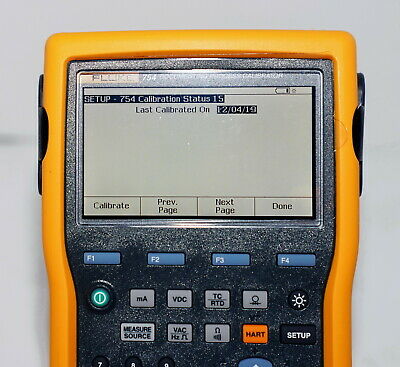
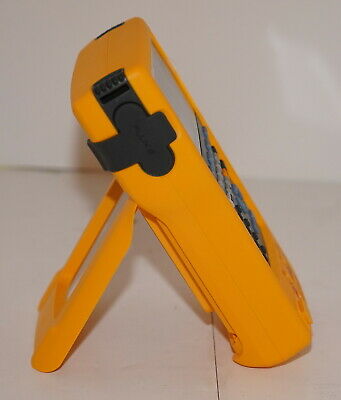
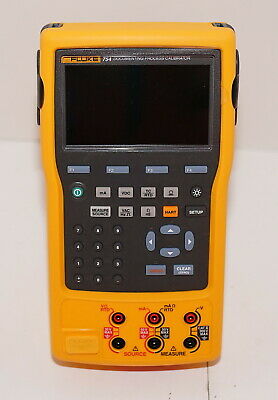
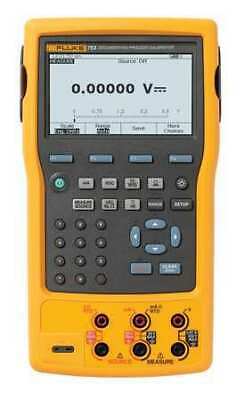
FLUKE 754 DOCUMENTING PROCESS CALIBRATOR WITH HART MFG SEP DEC 2019 NEW IN BOX
$ 3640.56
- Description
- Size Guide
Description
SERIOUS BIDDERS ONLY!PLEASE READ THE DESCRIPTION CAREFULLY!
You are bidding on the following:
*** BRAND NEW***
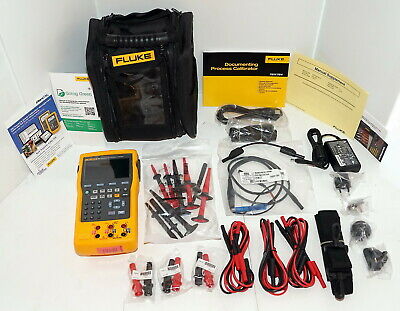
FLUKE 754 DOCUMENTING PROCESS CALIBRATOR WITH HART
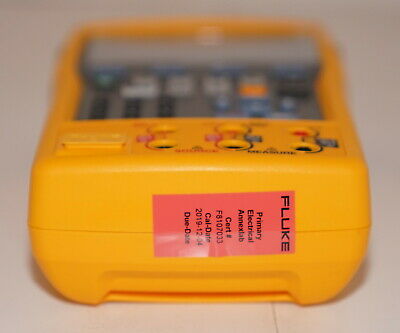
WE HAVE 2 UNITS AVAILABLE, BOTH UNITS ARE COMPLETE WITH CALIBRATION CERTIFICATES:
ONE CALIBRATED ON 09/11/2019 MISSING ORIGINAL CD, COPY OF THE CD IS INCLUDED
SECOND CALIBRATED ON 12/04/2019 AND IS COMPLETE WITH CALIBRATION CERTIFICATE
WE ALSO HAVE DPC/TRACK2 CALIBRATION MANAGEMENT SOFTWARE IN ANOTHER LISTING THAT WE CAN BUNDLE WITH THIS FLUKE 754
WE BUY ELECTRONICS AND TEST EQUIPMENTS.
IF YOU HAVE ANYTHING FOR SALE OR TRADE, JUST SEND US A MESSAGE
Retail: 00
Item Details:
Manufacturer:
FLUKE
Dscription:
The 754 is everything you needed and wished for in the 744 and more! HART communication capability is combined to deliver an integrated communicating calibrator. This rugged, reliable tool is ideal for calibrating, maintaining, and troubleshooting HART and other instrumentation.
The 754 does the work of several tools - sourcing, simulating and measuring pressure, temperature, and electrical signals in one rugged, hand-held device. You’ll fall in love with the new improved graphical screen, Li-Ion battery for longer life, USB port and new accessories to complete the package.
For documentation, the 754 automates calibration procedures and captures your data. And, of course, it helps you meet rigorous standards like ISO 9000, FDA, EPA and OSHA regulations.
HART Capabilities
The 754 is designed to take on nearly all the day-to-day tasks you now perform with a separate communicator. In fact, it offers most of the communication capabilities of a HART communicator.
To create a seamless/paperless calibration management system consider adding Fluke DPCTrack2 Calibration Management software
for use with your Fluke 753 and 754 or even legacy Fluke 743 and 744 calibrators.
The Fluke 754 Documenting Process Calibrator-HART: Work smarter. Work faster.
Work smarter. Work faster.
The 754 is a power multifunction documenting calibrator that lets you download procedures, lists, and instructions created with software-or upload data for printing, archiving, and analysis. The 754 also features a powerful built in HART® interface capable of performing nearly all the day-to-day tasks you now perform with a separate communicator.
Measure volts, mA, RTDs, thermocouples, frequency, and ohms to test sensors, transmitters and other instruments
Source/simulate volts, mA, thermocouples, RTDs, frequency, ohms, and pressure to calibrate transmitters
Power transmitters during test using loop supply with simultaneous mA measurement
Measure/source pressure using any of 29 Fluke 700Pxx Pressure Modules
Create and run automated as-found/as-left procedures to satisfy quality programs or regulations. Record and document results
Holds up to a full week of downloaded procedures and calibration results.
Use many features like autostep, custom units, user entered values during test, one-point and two-point switch testing, square root DP flow testing, programmable measurement delay etc.
Easy to use
Three year warranty
Bright white dual display. Read both sourced and measured parameters simultaneously.
Multi lingual interface
Rechargeable Li-Ion battery for 10 hour uninterrupted use. Includes gas gauge.
Handling of fast pulsed RTD transmitters and PLCs, with pulses as short as 1 ms.
Delivered with DPC/Track Sample software.
Compatible with many Asset Management software packages.
HART Capabilities
The 754 is designed to take on nearly all the day-to-day tasks you now perform with a separate communicator. In fact, it offers the communication capabilities of the 375 HART communicator.
Requires no external box or second tool for everyday HART calibration and maintenance.
Offers fast HART communication.
Supports popular models of HART transmitters, with more devise-specific command support than any other HART field calibrator.
Works with multiple masters, burst mode, and multi-drop configurations.
Is easy to update as additional instruments are added and new HART versions are released.
Interrogate to determine device type, manufacturer, model, tag.
Reconfigure the sensor mapping of dual sensor temperature transmitters.
Read HART PV function and smart transmitter digital output while measuring analog mA output.
Read and write HART configuration functions to make field adjustments to PV range points, damping, and other top-level configuration settings.
Re-label smart transmitters by reading and writing to the HART tag field.
Versatile HART Protocol support
Manufacturer
Pressure instruments
Temperature instruments
Coriolis instruments
ABB/Kent-Taylor
600T
658T
1
ABB/Hartmann & Braun
Contrans P
1
,
AS 800 Series
Endress & Hauser
CERABAR S,
CERABAR M,
DELTABAR S
TMT 122
1
,TMT 182
1
,
TMT 162
1
Foxboro Eckardt
TI/RTT20
1
Foxboro/Invensys
I/A Pressure
Fuji
FCX
FCXAZ
FRC
Honeywell
ST3000
STT25T
1
,
STT25H
1
Micro Motion
2000
2000 IS
9701
9712
9739
Moore Products
344
1
Rosemount
1151
2088
3001C
3051, 3051S
3044C
644
3144
3244, 3144P
Siemens
SITRANS P DS
SITRANS P ES
SMAR
LD301
TT301
1
Viatran
I/A Pressure
Wika
UNITRANS
T32H
1
Yokogawa
EJA
YTA 110, 310
and 320
1
Sensor Trim not supported
The 754 supports the commands contained in HART protocol Version 5.7. With 2 MB of memory, the 754 supports a substantial set of HART instructions:
Universal commands provide functions that are implemented in all field devices, for example, read manufacturer and device type, read primary variable (PV), or read current output and percent of span.
Common practice commands provide functions that are common to many but not all field devices, for example read multiple variables, set damping time, or perform loop test.
Device-specific commands provide functions that are unique to a particular field device, for example sensor trim.
HART Operating Modes Supported
Point to Point operation , the most commonly used mode, connects the 754 to a single HART device in a 4-20 mA loop.
In Multi-Drop mode , several HART instruments can be bussed together. The 754 searches for each, identifies addresses in use, and allows you to select the instrument for calibration and related operations.
In Burst Mode, the HART instrument transmits bursts of data without waiting to be interrogated by a master unit. The 754 can take transmitters out of burst mode during test or calibration, then later restore them to burst mode.
Pressure Modules
Covers virtually any pressure application including gauge, differential, dual (compound), absolute, and vacuum.
Display pressure readings in any of 10 different pressure units you specify in the calibrator setup.
Rugged urethane molded cases protect the modules from rough handling and harsh conditions.
Features internal temperature compensation from 0° to 50°C for full accuracy performance.
Includes NIST-traceable calibration certificate.
Modules can be calibrated locally, helping to control costs.
A family of 29 optional pressure modules provides pressure calibration and measurement capabilities. Twenty-eight modules are available, with basic accuracy specs to 0.05%. Ranges start at 0 – 1 inH
2
0 (0 – .25kPa) and go to 0 – 10,000 psi (0 – 70,000 kPa). Additional information about pressure modules is available on the Pressure Modules Home Page.
Automated Procedures
Allow you to quickly set up powerful, automated calibration procedures for linear transmitters, DP flow transmitters, and one- and two-point limit switches. Simply select the appropriate measure and/or source functions and fill out the procedure template. The 750 Series does the rest. It quickly performs the test, calculates the errors, and displays the final results, highlighting out of tolerance points.
Custom Units
Enable you to map one unit to another, such as mV to °C or °F. Allows you to use the Fluke 750 Series with millivolt output accessories such as the Fluke 80T-IR Temperature Probe, and to document tests using non-supported units such as parts per million or revolutions per minute.
User-entered Values
Enables technicians to record calibration results that were sourced and/or measured by other devices such as panel meters or readout-only devices.
Limit Switch Calibration
Procedures perform fast, automated calibration of one and two-point limit switches for voltage, current, temperature, and pressure.
Differential Pressure Flow Instrument Calibration
Routines use a square root function to directly calibrate DP flow instruments.
Additional Features
Multifunctional
Calibrate temperature, pressure, voltage, current, resistance, and frequency. Since it both measures and sources, you can troubleshoot and calibrate all with one rugged tool.
Powerful, yet easy to use
The easy-to-follow menu-driven display guides you through any task. Get up to speed in minutes, not days. Programmable calibration routines enable you to create and run automated as-found/as-left procedures to ensure fast, consistent, calibrations.
Records and documents results
To support your ISO-9000 or regulatory standards the Fluke 754 captures your calibration results, eliminating the need to juggle a pen and pad in the field. The USB interface lets you transfer the results to a PC, thus saving the time of having to manually transcribe them when you return to the shop.
Truly hand-held
Small enough to fit easily into a tool bag and to use in tight spaces. Runs an entire shift on a rechargeable Li-ion battery pack.
Rugged and reliable
Count on Fluke's rugged design to deliver top accuracy and reliability in harsh environments. Overmolded urethane case stands up to rough handling in industrial environments.
Bright white display
Lets you read your results in any kind of light. Backlight has three (3) settings.
Soft keys
Provide one-touch access to enhanced functions such as task lists, automated procedures, scaling, min/max, stepping and ramping, and review memory.
Three operating modes
Measure, Source, or simultaneous Measure/Source, - enable technicians to troubleshoot, calibrate, or maintain instrumentation with just one tool.
Multi-lingual interface
Displays instructions in English, French, German, Spanish, and Italian.
Built-in algebraic calculator
With four functions-plus square root-stores, recalls, and performs calculations required for setting up instruments or evaluating data in the field. Use it to set the source function to a calculated value. There's no need to carry a pencil and paper or a separate calculator.
Programmable measurement delay
Inside automated procedures permits calibrating instruments that respond slowly.
Measurement Accuracy
Voltage DC
Range/Resolution
1 Year
2 Years
100.000 mV
0.02% + 0.005 mV
0.03% + 0.005 mV
3.00000 V
0.02% + 0.00005 V
0.03% + 0.00005 V
30.0000 V
0.02% + 0.0005 V
0.03% + 0.0005 V
300.00 V
0.05% + 0.05 V
0.07% + 0.05 V
Voltage AC
3.000 V (40 Hz to 500 Hz) / 0.001 V
0.5% + 0.002 V
1.0% + 0.004 V
30.00 V (40 Hz to 500 Hz) / 0.01 V
0.5% + 0.02 V
1.0% + 0.04 V
300.0 V (40 Hz to 500 Hz) / 0.1 V
0.5% + 0.2 V
1.0% + 0.2 V
Current DC
30.000 mA
0.01% + 5 uA
0.015% + 7 uA
110.00 mA
0.01% + 20 uA
0.015% + 30 uA
Resistance
10.000 Ω
0.05% + 50 mΩ
0.07% + 70 mΩ
100.00 Ω
0.05% + 50 mΩ
0.07% + 70 mΩ
1.0000 kΩ
0.05% + 500 mΩ
0.07% + 0.5 Ω
10.000 kΩ
0.1% + 10 Ω
0.15% + 15 Ω
Frequency
1.00 to 110.00 Hz / 0.01 Hz
0.05 Hz
110.1 to 1100.0 Hz / 0.1 Hz
0.5 Hz
1.101 to 11.000 kHz / 0.001 kHz
0.005 kHz
11.01 to 50.00 kHz / 0.01 kHz
0.05 kHz
Source Accuracy
1 Year
2 Years
Voltage DC
100.000 mV
0.01% + 0.005 mV
0.015% + 0.005 mV
1.00000 V
0.01% + 0.00005 V
0.015% + 0.0005 V
15.0000 V
0.01% + 0.0005 V
0.015% + 0.0005 V
Current DC
22.000 mA (source)
0.01% + 0.003 mA
0.02% + 0.003 mA
Current sink (simulate)
0.02% + 0.007 mA
0.04% + 0.007 mA
Resistance
10.000 Ω
0.01% + 10 mΩ
0.015% + 15 mΩ
100.00 Ω
0.01% + 20 mΩ
0.015% + 30 mΩ
1.0000 kΩ
0.02% + 0.2 Ω
0.03% + 0.3 Ω
10.000 kΩ
0.02% + 3 Ω
0.03% + 5 Ω
Frequency
0.1 to 10.99 Hz
0.01 Hz
0.01 to 10.99 Hz
0.01 Hz
11.00 to 109.99 Hz
0.1 Hz
110.0 to 1099.9 Hz
0.1 Hz
1.100 to 21.999 kHz
0.002 kHz
22.000 to 50.000 kHz
0.005 kHz
Technical Data
Data log functions
Measure functions
Voltage, current, resistance, frequency, temperature, pressure
Reading rate
1, 2, 5, 10, 20, 30, or 60 readings/minute
Maximum record length
8000 readings (7980 for 30 or 60 readings/minute)
Ramp functions
Source functions
Voltage, current, resistance, frequency, temperature
Rate
4 steps/second
Trip detect
Continuity or voltage (continuity detection not available when sourcing current)
Loop power function
Voltage
Selectable, 26 V
Accuracy
10%, 18 V minimum at 22 mA
Maximum current
25 mA, short circuit protected
Maximum input voltage
50 V DC
Step functions
Source functions
Voltage, current, resistance, frequency, temperature
Manual step
Selectable step, change with arrow buttons
Autostep
Fully programmable for function, start delay, stepvalue, time per step, repeat
Environmental Specifications
Operating temperature
-10°C to +50°C
Storage temperature
-20°C to +60°C
Dust/water resistance
Meets IP52, IEC 529
Operating altitude
3000 m above mean sea level (9842 ft)
Safety Specifications
Agency approvals
CAN/CSA C22.2 No 1010.1-92, ASNI/ISA S82.01-1994, UL3111, and EN610-1:1993
Mechanical and General Specifications
Size
136 x 245 x 63 mm (5.4 x 9.6 x 2.5 in)
Weight
1.2 kg (2.7 lb)
Batteries
Internal Battery Pack Li-ion: 7.2V,4400mAh, 30 Wh
Battery life
>8 hours typical
Battery replacement
Replace without opening calibrator; no tools required
Side port connections
Pressure module connector
USB Connector to interface to your PC
Digital instrument (HART) connector
Connection for optional battery charger/eliminator
Data storage capacity
1 week of calibration procedures results
90 day specifications
The standard specification interval for the 750 Seriesare 1 and 2 years.
Typical 90 day measurement and source accuracy can be estimated by dividing the one year "% of reading" or "% of output" specifications by 2.
Floor specifications, expressed as "% of full scale" or "counts" or "ohms" remain constant.
Temperature, Resistance Temperature Detectors
Degrees or % of reading - Type (α)
Range °C
Measure °C
1
1 year
2 year
100 Ω Pt (385)
-200 to 100
100 to 800
0.07°C
0.02% + 0.05°C
0.14°C
0.04% + 0.10°C
200 Ω Pt (385)
-200 to 100
100 to 630
0.07°C
0.02% + 0.05°C
0.14°C
0.04% + 0.10°C
500 Ω Pt (385)
-200 to 100
100 to 630
0.07°C
0.02% + 0.05°C
0.14°C
0.04% + 0.10°C
1000 Ω Pt (385)
-200 to 100
100 to 630
0.07°C
0.02% + 0.05°C
0.14°C
0.04% + 0.10°C
100 Ω Pt (3916)
-200 to 100
100 to 630
0.07°C
0.02% + 0.05°C
0.14°C
0.04% + 0.10°C
100 Ω Pt (3926)
-200 to 100
100 to 630
0.08°C
0.02% + 0.06°C
0.16°C
0.04% + 0.12°C
10 Ω Cu (427)
-100 to 260
0.2°C
0.4°C
120 Ω Ni (672)
-80 to 260
0.1°C
0.2°C
Source current
Source °C
Allowable current
2
1 year
2 year
1 mA
0.05°C
0.0125% + 0.04°C
0.10°C
0.025% + 0.08°C
0.1 mA to 10 mA
500 μA
0.06°C
0.017% + 0.05°C
0.12°C
0.034% + 0.10°C
0.1 mA to 1 mA
250 μA
0.06°C
0.017% + 0.05°C
0.12°C
0.034% + 0.10°C
0.1 mA to 1 mA
150 μA
0.06 C
0.017% + 0.05°C
0.12 C
0.034% + 0.10°C
0.1 mA to 1 mA
1 mA
0.05°C
0.0125% + 0.04°C
0.10°C
0.025% + 0.08°C
0.1 mA to 10 mA
1 mA
0.05°C
0.0125% + 0.04°C
0.10°C
0.025% + 0.08°C
0.1 mA to 10 mA
3 mA
0.2°C
0.4°C
0.1 mA to 10 mA
1 mA
0.04°C
0.08°C
0.1 mA to 10 mA
1. For two and three-wire RTD measurements, add 0.4°C to the specifications.
2. Supports pulsed transmitters and PLCs with pulse times as short as 1 ms
Temperature, Thermocouples
Type
Source °C
Measure °C
Source °C
1 year
2 years
1 year
2 years
E
-250 to -200
1.3
2.0
0.6
0.9
-200 to -100
0.5
0.8
0.3
0.4
-100 to 600
0.3
0.4
0.3
0.4
600 to 1000
0.4
0.6
0.2
0.3
N
-200 to -100
1.0
1.5
0.6
0.9
-100 to 900
0.5
0.8
0.5
0.8
900 to 1300
0.6
0.9
0.3
0.4
J
-210 to -100
0.6
0.9
0.3
0.4
-100 to 800
0.3
0.4
0.2
0.3
800 to 1200
0.5
0.8
0.3
0.3
K
-200 to -100
0.7
1.0
0.4
0.6
-100 to 400
0.3
0.4
0.3
0.4
400 to 1200
0.5
0.8
0.3
0.4
1200 to 1372
0.7
1.0
0.3
0.4
T
-250 to -200
1.7
2.5
0.9
1.4
-200 to 0
0.6
0.9
0.4
0.6
0 to 400
0.3
0.4
0.3
0.4
B
600 to 800
1.3
2.0
1.0
1.5
800 to 1000
1.0
1.5
0.8
1.2
1000 to 1820
0.9
1.3
0.8
1.2
R
-20 to 0
2.3
2.8
1.2
1.8
0 to 100
1.5
2.2
1.1
1.7
100 to 1767
1.0
1.5
0.9
1.4
S
-20 to 0
2.3
2.8
1.2
1.8
0 to 200
1.5
2.1
1.1
1.7
200 to 1400
0.9
1.4
0.9
1.4
1400 to 1767
1.1
1.7
1.0
1.5
C
0 to 800
0.6
0.9
0.6
0.9
800 to 1200
0.8
1.2
0.7
1.0
1200 to 1800
1.1
1.6
0.9
1.4
1800 to 2316
2.0
3.0
1.3
2.0
L
-200 to -100
0.6
0.9
0.3
0.4
-100 to 800
0.3
0.4
0.2
0.3
800 to 900
0.5
0.8
0.2
0.3
U
-200 to 0
0.6
0.9
0.4
0.6
0 to 600
0.3
0.4
0.3
0.4
BP
0 to 1000
1.0
1.5
0.4
0.6
1000 to 2000
1.6
2.4
0.6
0.9
2000 to 2500
2.0
3.0
0.8
1.2
XK
-200 to 300
0.2
0.3
0.2
0.5
300 to 800
0.4
0.6
0.3
0.6
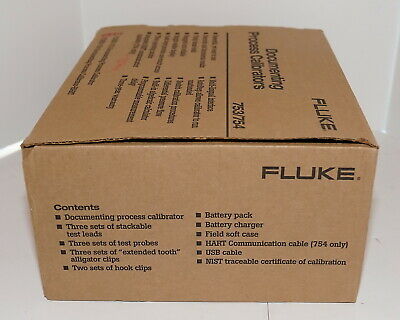
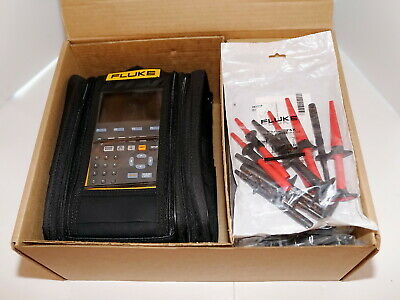
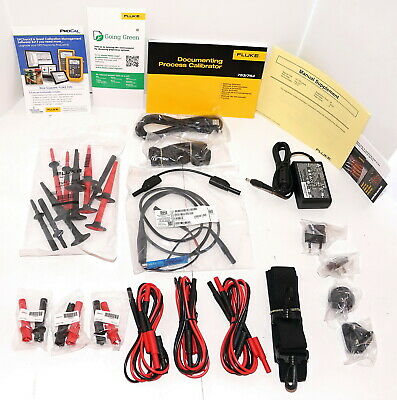
Includes:
BC7240 battery charger
Li-on BP7240 battery pack
Instruction manual
Three sets of TP220 test probes with three sets of “extended tooth" alligator clips
Two sets AC280 hook clips
C799 Soft Field Case
USB communication cable, Fluke 754HHC HART communications cable
Condition:
NEW
Auction Details:
Shipping:
All
domestic
packages will be shipped out via Fedex or UPS within the lower 48 states
Shipping to Hawaii and Alaska would be extra, and those shipments will be shipped out via USPS priority mail, unless otherwise stated in the auction or negotiated in emails.
Shipping to APO, RR, or PO box will be handled via USPS and would be extra on certain items, please email us prior bidding.
Goods will be dispatched the latest in
2
business days.
Goods will be shipped out after the holidays and weekends.
No local pick
ups accepted at this time, unless otherwise stated in the auction
Shipping costs are set at that price to cover some of our costs and packaging and handling fees as well as some of the ebay and paypal fees which add to about 8.5% of the total end price. Please don't email us to negotiate about the shipping costs. We are extremely busy, so we might not answer your emails.
Shipping and handling fees are not negotiable, by bidding on this item the buyer agrees to pay for all the shipping costs, failure to do so will result a non paying bidder.
We ship to any destination in the world.
INTERNATIONAL BUYERS:
The International shipping rate is flat rate to most destinations in the world, please email us for additional information.
California buyers are subject to pay 9.25% tax.
International buyers are responsible for all tax and custom duty charges outside the country.
Payment:
U.S. Buyers:
Credit cards through PayPal
Please note that we can't accept direct credit card payments at this time
International Buyers:
PayPal or Wire
Payment is due within 14 days of auction closing.
If payment is not received within this time unless otherwise stated or negotiated, item will be relisted on eBay. And the buyer would be reported as NON-PAYING bidder.
Terms & Conditions:
After the auction is closed,
auction winners should contact us within 3 days regarding any questions or requests.
After the auction is closed, payment should be received within 14 days.
A non paying bidder will be filed with ebay after 14 days of non received payment.
All sales are final
Any returned non-defective item(s) is subject to 20% restocking fee
Shipping and handling charges are not returnable
Items will be replaced or exchanged in case of DOA
If the same item or similar item is not in stock in case of DOA, the buyer will receive a refund back
We combine shipping to save customers money, however, there will be an additional charge per item, please read the description for each item to find out about the specific fees.
All buyers are subject to pay all taxes and duty fees inside and outside of the United States, failure to do so will result a negative feedback and buyers will be reported to ebay.
Our facilities are closed during the weekends and other holidays and there will be no shipments during these time periods. All packages will go out after the weekend or after the holidays.
Contact Information:
For any questions regarding this or any of our other auctions please use ebay messaging system.
